Learn to create a simple Todo App with Metal.js and JSX
Adding Todos
You almost have a fully functioning Todo App! The only missing feature is the ability to add new todos to the list. This is where the TodoForm component comes into play.
First, go ahead and add a couple of event listeners: one for the form submission (onsubmit) and one for when the input value changes (onkeyup):
// TodoForm.js

class TodoForm extends JSXComponent {
    render() {
        return (
            <form class="todo-form" data-onsubmit={this.handleSubmit.bind(this)}>
                <label for="title">
                    Todo
                    <input
                        data-onkeyup={this.handleChange.bind(this)}
                        name="title"
                    />
                </label>
                <button type="submit">Add</button>
            </form>
        );
    }

    handleSubmit(event) {
        // Prevent default browser functionality
        event.preventDefault();
    }

    handleChange(event) {
    }
}
Now you can use the value property from STATE to keep track of the changes made to the input value. This makes the input a controlled input, where the value of the input is controlled by the state of the component. In other words, when the value of the state changes, it automatically changes the value in the input as well, keeping the two in sync.
// TodoForm.js

class TodoForm extends JSXComponent {
    render() {
        return (
            <form class="todo-form" data-onsubmit={this.handleSubmit.bind(this)}>
                <label for="title">
                    Todo
                    <input
                        data-onkeyup={this.handleChange.bind(this)}
                        name="title"
                        value={this.state.value}
                    />
                </label>
                <button type="submit">Add</button>
            </form>
        );
    }

    ...

    handleChange(event) {
        this.state.value = event.target.value;
    }
}
The value of this.state.value will now match the value in the input.
You can also emit a custom event when the form is submitted, similarly to what TodoItem does to notify the parent component that something happened:
// TodoForm.js

class TodoForm extends JSXComponent {
    ...

    handleSubmit(event) {
        event.preventDefault();

        if (this.state.value) {
            this.emit('todoAdd', {
                title: this.state.value
            });

            // Clears the input value
            this.state.value = '';
        }
    }
}
Then in the TodoApp component, you can listen to this event and add a new todo:
// TodoApp.js

class TodoApp extends JSXComponent {
    render() {
        return (
            <div class="todo-app">
                ...

                <TodoForm
                    events={{
                        todoAdd: this.handleTodoAdd.bind(this)
                    }}
                 />
            </div>
        );
    }

    addTodo(title) {
        // Creates a new array with all of the elements
        // from the previous array, with the newly added item
        this.state.todos = [...this.state.todos, {
            done: false,
            title
        }];
    }

    handleTodoAdd(event) {
        this.addTodo(event.title);
    }

    ...
}
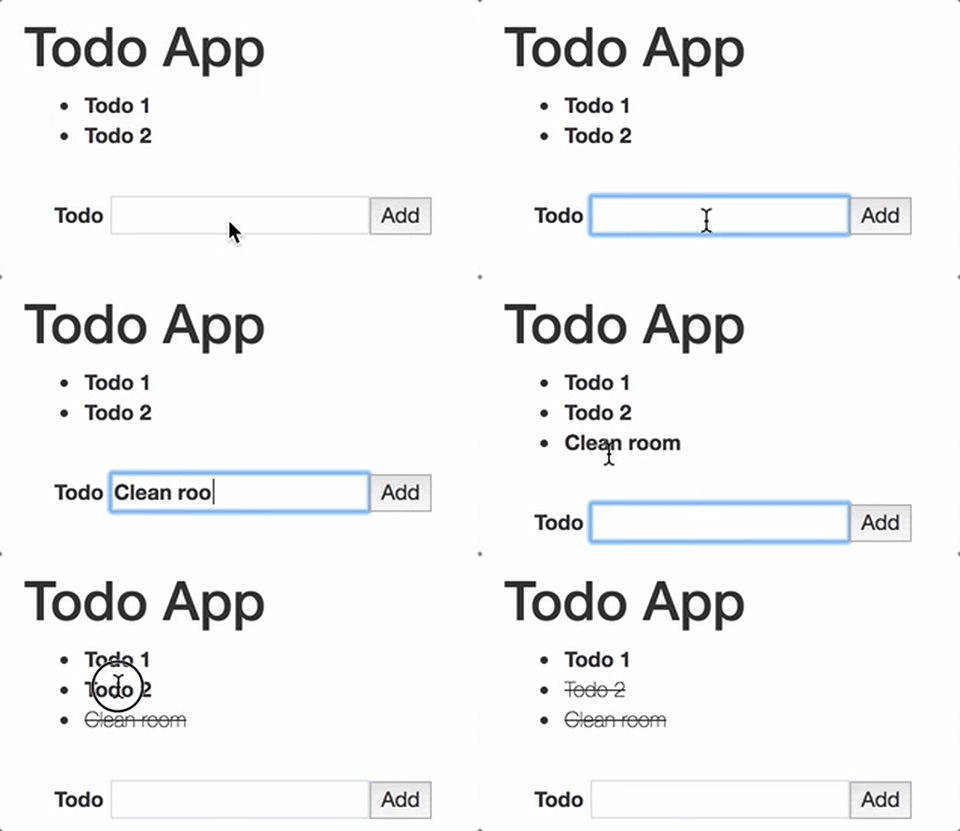
Now when you add some text to the input and submit the form, a new todo is automatically added to the list.
That's it! You've successfully created a simple Todo App with Metal.js. Now that you are comfortable with the basics, check out the guides for more advanced documentation.

